Persephone's Tunic! Goddess of Spring and of Innocence, daughter of Demeter, goddess of Nature. It just seems so fitting.
And yes, the pattern is finished and ready for sale (big sigh of relief).
I'm going to go clean my house now, or maybe I'll take a nap instead.
Thursday, January 31, 2008
Wednesday, January 30, 2008
Contest Results...not yet :-)
Soon, soon! Yes, I have picked a winner and I promise I will reveal my decision first thing tomorrow. I've got to edit the pattern so the name is on it :-)
I can't tell you what a tough decision this has been, so many great names. I'm thinking of offering a 2nd and 3rd place and using those names for upcoming patterns, as long as it's ok with those that picked the runner up names.
And, yes, I know Thursdays are supposed to be one of my days off. I'm just so ready to release this pattern. Kind of like giving birth, I just want to get it over with :-)
Monday, January 28, 2008
Stretchy (sewn) Bind Off
Yes, I'm early with this one. We'll just pretend it's Tuesday.
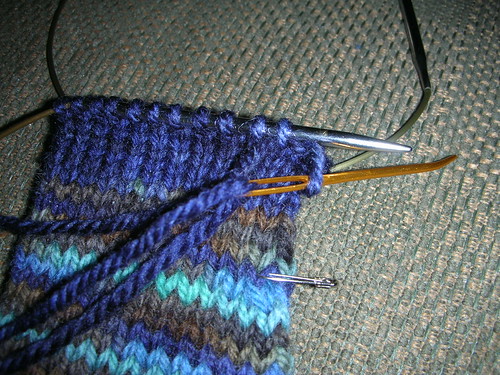
This bind off is grrrrreat for toe up socks, neck bands, waist bands, top-down hats any place you need to stretch.

Our lovely Chibi needle on the end of the yarn. Measure out a length of yarn 4x's the width of the circumference of the item (just loosely drape the yarn around the piece 4 times). Better to have too much than too little and this is a very safe amount.

Insert the needle from right to left through 2 stitches and pull yarn through.

Going from left to right, go back through the first stitch.
Pull the first stitch off the needle.
Repeat these steps until all the stitches have been sewn.
Voila, a stretchy bind off. FYI, this matches the twisted loop cast on nicely.
This bind off is grrrrreat for toe up socks, neck bands, waist bands, top-down hats any place you need to stretch.
Our lovely Chibi needle on the end of the yarn. Measure out a length of yarn 4x's the width of the circumference of the item (just loosely drape the yarn around the piece 4 times). Better to have too much than too little and this is a very safe amount.
Insert the needle from right to left through 2 stitches and pull yarn through.
Going from left to right, go back through the first stitch.
Pull the first stitch off the needle.
Repeat these steps until all the stitches have been sewn.
Voila, a stretchy bind off. FYI, this matches the twisted loop cast on nicely.
Sunday, January 27, 2008
Whittled Down the List
Ok, I've finally whittled down the list to my favorites. Seriously, this was hard to do. I really liked a lot of the suggestions. Now you can vote on your favorite, see the poll on the top right side of your screen.
Thank you all so much for your help!
Thank you all so much for your help!
Friday, January 25, 2008
Ferklempt
The response to this little blog contest of mine has been so incredible. We all must feel the same thing when looking at the sweater because almost every name was right along the lines I was thinkning, garden and fairy/elf. I don't know if you all made this decision easier or harder. I don't think there was even one name that I didn't like. Now that the rush to put in your suggestion is waning, I'm putting up a list of ones that struck my fancy. So as to not reveal my preference just yet, I'm listing them in alphabetical order. As you can see, the list is long. This will be a tough decision, so please, if I chose your name, convince me! Why should I choose your name?
Butterflies in the garden
Cherub Wings
Coraria, after the beautiful Sumac which has been 'used by Egyptian and Greek during Antiquity as a wool dye'
Elven Delight
Evenstar (Arwen translated, I love Arwen, but alas, it is taken by a beautiful Kate Gilbert sweater).
Ivy League
Laurel
Peaseblossom
Persephone's Tunic (Demeter's Tunic for the big person sweater, Demeter was the goddess of nature and Persephone was her daughter)
Petiole
Poise ‘n’ Ivy
Sapling
Variations of Sprout, bean sprout, 'lil sprout, wee sprout, sproutlet
Sugar Snap
Sweet Pea
UnbeLEAFable Sweater (I'm into puns)
Up, up and away
Tuesday, January 22, 2008
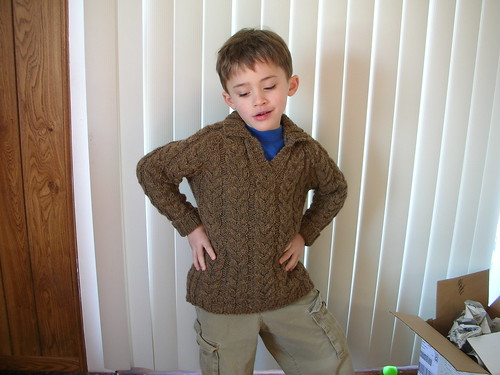
Name this sweater contest.
I am soooo close to finishing up this pattern. It's been in the making since last August. Now it has been tested and edited and retested. Only problem, I'm at a loss as to what to call it. So far it's been labeled "Leaf Lace Sweater" but that just isn't a pretty name. So please, please help me come up with a name for this sweater! I'm going to leave the contest open for a week and after that time, I'll pick my favorite name and the winner will receive $10 store credit at my website, good for patterns or my hand-dyed bamboo yarn.


To vote, enter your name for the sweater in the comments section.
Mommy version can be seen here:
http://www.adorabubbleknits.com/catalog.php?item=12
To vote, enter your name for the sweater in the comments section.
Mommy version can be seen here:
http://www.adorabubbleknits.com/catalog.php?item=12
Monday, January 21, 2008
Recipe for a Hat
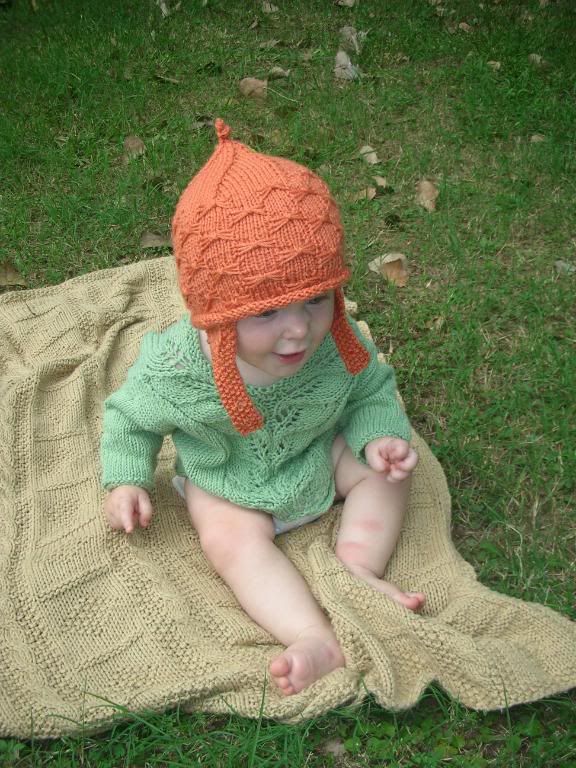
I've decided to share my basic recipe for a hat. Your head, your yarn, your gauge. It is much simpler than it looks, trust me.
1) Figure your gauge. ie 5 sts per 1"
2) Measure head circumference and subtract 2." ie 18"-2"= 16"
3) Multiply #2 by #1. ie 16 x 5= 80
4) Round #3 to the nearest multiple of 6 (preferably down). ie 78
5) Measure head over the top from earlobe to earlobe. ie 14"
6) Divide that number by 2 and then subtract 2" for the decrease rounds. 14/2=7 - 2= 5
7) Cast on #4.
8) Knit until the piece measure #6 (you can work whatever hem you want).
9) Divide #4 by 6. ie 78/6=13
10) Place stitch markers after ever (insert #9) stitches.
11) Knit to 2 sts before st marker, k2tog, around.
12) Knit one round even.
13) Repeat 11 and 12 until there are 6 sts, draw yarn through 6 sts, pull tight and weave in ends.
Voila, a hat made perfectly for you.
Here are a few examples of different things you can do with the recipe. I put all the calculations into a spreadsheet so I don't have to get my calculator out everytime I need to crunch the numbers. If anyone wants the spreadsheet, just let me know and I'll email it to you!


Saturday, January 19, 2008
Dumpster Divin' fun!
I scored big time at the thrift stores this weekend. While I didn't come away with 5 big bags of sweaters like I did last time, I did find a couple treasures. Just as I was about to give up at the last store, my hands felt something soft and yummy. I pull out the sweater, check the tag... 85% silk 15% cashmere. Mmmmm, yarn snob heaven. Another minute later, a wool Banana Republic sweater that will not get ripped apart. And... a cappuchino machine! Very satisifying shopping trip.
Pics to come.
Pics to come.
Thursday, January 17, 2008
Ravelry is interferring with my life!
Ok, I have to set rules for myself or I will waste my life away on the internet. I've been so busy playing with my website, browsing Ravelry, emailing and just playing on the computer that I've hardly had time to knit! So, I'm going to take a couple days of each week where I won't even turn on the computer. Tuesdays and Thursdays will be my days off with limited time on the computer over the weekend. Yes, I know today is Thursday and as soon as I finish this blog, the computer goes off.
I'm gonna be dyeing bamboo today and playing with Aidan and Asa. I might have pics tomorrow of my bamboo escapades. Fun, fun, fun!
I'm gonna be dyeing bamboo today and playing with Aidan and Asa. I might have pics tomorrow of my bamboo escapades. Fun, fun, fun!
Wednesday, January 16, 2008
My new assistant
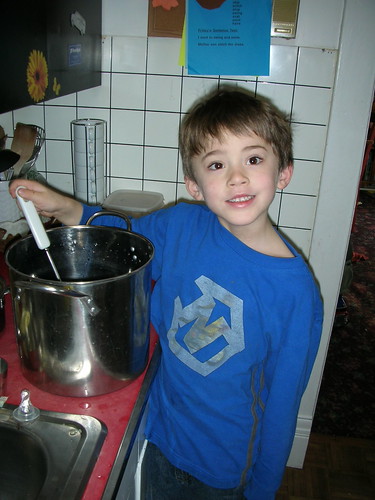
Meet my new assistant, Aidan. I thought having him help me dye yarn would be a good lesson in how colors work and also a great way to spend time together. Here is his latest creation, Mr. Slappy Face. He picked the colors, poured the dye and named the colorway.
Here it is "cooking."

When I asked him what he wanted to do with the yarn, he said, "Sell it at the yarn store." So, it is now for sale at my hyena cart store, http://www.hyenacart.com/adorabubbleknits
My little entrepreneur.
Monday, January 14, 2008
Spinning my life away
I should never have started. It is harder to put away than my knitting is.
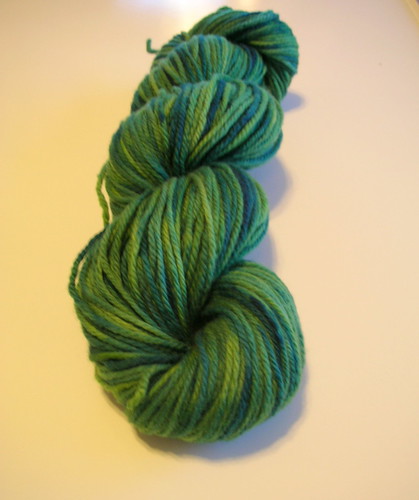
Here is the fruit of my labor.

About 3" too short. I'm totally in love with the nubby, imperfectness of the handspun wool and the purple/black dyeing is gorgeous.

So now I am spinning more and will be dyeing more tomorrow. Since I doubt I'll be able to replicate it exactly, I'll just have to alternate rows of each dye lot.
Here is the fruit of my labor.
About 3" too short. I'm totally in love with the nubby, imperfectness of the handspun wool and the purple/black dyeing is gorgeous.
So now I am spinning more and will be dyeing more tomorrow. Since I doubt I'll be able to replicate it exactly, I'll just have to alternate rows of each dye lot.
Saturday, January 12, 2008
The Birth of a Spinner
I've been wanting/resisting to try my hand at spinning. Armed with a gift certificate to The Yarn Stash, I got my roving then heading to the craft store for a dowel and wooden car wheel (I gotta make my own whorl of course). I got home, put my spindle together, making a sword for the boys out of the extra pieces and sat down at the computer to watch some online videos of how to do it. I'm usually one that picks things up (especially fiber related) fairly quickly, but I was lost. I tucked all my spinning supplies in a basket to await my weekend trip to my LYS where Amy showed me how to really do it. I am hooked. Now I don't know if I'll have time for knitting let alone time to finish my designs. I've been spinning all afternoon and so far have about 50 gms of wool. Pretty pathetic. Hubbie looked at me and said, "I don't know if you are aware, but you can buy wool already spun into yarn." He doesn't get it.
Thursday, January 10, 2008
Sunrise, sunset...
It is 8:15 am and the sun and still not yet risen. I love North Dakota, but I have a hard time dealing with this more than the cold. The sun doesn't officially rise until about 8:30. We should be in the Mountain time zone, but whoever created the borders decided to reach over about 100 miles and snag up Minot. I'm one of those that likes to rise with the sun. 8:30 is not a feasible time for me to start my day. I think I need to get one of those alarm clocks that slowly turns a light on. Ok, I'm done with my rant.
Today...
I really want to finish up the instructions for making custom britches, your gauge, your measurements. Tricky part is making it understandable.
Also, I hope to get more work done on the baby bag. This has been my toughest design yet. Not because it is difficult, it's actually very simple to knit. The calculations are what make it hard. It's a compound raglan which means you don't increase every alt. row like most raglans have you doing. If you increase every alt. row, you wind up with an enormous body and sleeves. To prevent that, you work alt. row increases for part of the raglan and every 4th row for the rest. Calculating when to switch is where it gets tricky. I've got all the sizes figured out for the plain bag and am knitting an actual piece so my testers know what they are creating. The cabled one is even tougher because the cables pull. I've been having to do a lot of swatching to get this one right.
Tuesday, January 8, 2008
How-To Tuesday: Short Rows, ahhhhh!
Ok, I finally got it down. The problem with most all the tutorials I've seen on the net is the short rows are all knit flat and I want it in the round. This is very picture heavy, no tripod yet so the video tutorial will have to wait.
So, here it is. First up is Japanese short rows in the round. You will need safety pins to work these. You might be able to do it without, but the pins make it easier.
Knit to where you want your first short row to go. Turn and place a safety pin on the working yarn.


Slip the first stitch and purl across to next short row placement.

Turn and place safety pin on working yarn. Slip the first st and knit across to your next short row placement (in the britches pattern this is 3 stitches before last short row hole.
Continue in this manner until you've worked all the short rows required.
Closing the short rows. Here is where this version differs from others I've seen. You are going to close the left side short row holes and instead of turning, you will knit around to the right side short row holes.
Left side short row holes:

After working all the short rows, your piece should be right side out. Knit to the first left side hole. Pick up the safety pin and place the loop on the left needle.

Knit this loop together with the next st. Do this for each of the right side short row holes.
Left Side holes:
Do not turn! Keep knitting around until you get to 1 stitch before the first left side hole. Slip this stitch knitwise. Pick up the safety pin and place the loop on the left needle. Place slipped stitch back onto left needle and it knit it together with the loop like you would knit an ssk.

Repeat this for each of the right side short rows.
Tada!


So, here it is. First up is Japanese short rows in the round. You will need safety pins to work these. You might be able to do it without, but the pins make it easier.
Knit to where you want your first short row to go. Turn and place a safety pin on the working yarn.
Slip the first stitch and purl across to next short row placement.
Turn and place safety pin on working yarn. Slip the first st and knit across to your next short row placement (in the britches pattern this is 3 stitches before last short row hole.
Continue in this manner until you've worked all the short rows required.
Closing the short rows. Here is where this version differs from others I've seen. You are going to close the left side short row holes and instead of turning, you will knit around to the right side short row holes.
Left side short row holes:
After working all the short rows, your piece should be right side out. Knit to the first left side hole. Pick up the safety pin and place the loop on the left needle.
Knit this loop together with the next st. Do this for each of the right side short row holes.
Left Side holes:
Do not turn! Keep knitting around until you get to 1 stitch before the first left side hole. Slip this stitch knitwise. Pick up the safety pin and place the loop on the left needle. Place slipped stitch back onto left needle and it knit it together with the loop like you would knit an ssk.
Repeat this for each of the right side short rows.
Tada!
Monday, January 7, 2008
Neck Deep in the Bag
I've settled on a program and am so glad I did. I chose Knit Visualizer and am in love with it. I should have bought it months ago, it would have saved me (and some of my test knitters) much hassle. It's $135 for the program, but sooo worth it. A huge thank you to Nancy for creating it for us.
Now that I have the software, I am cruising on finishing the Baby Bag. So far the rough draft of the plain version is complete. Features for this include a super cute button along the raglan sleeve, car seat buckle hole option, 3 different sizes, newborn to 2T, knit in the round (gotta love seamless), button bottom or box bottom options. I've also included instructions for just a plain sweater without the bag bottom. This is the sweater version, for the bag just picture it longer.
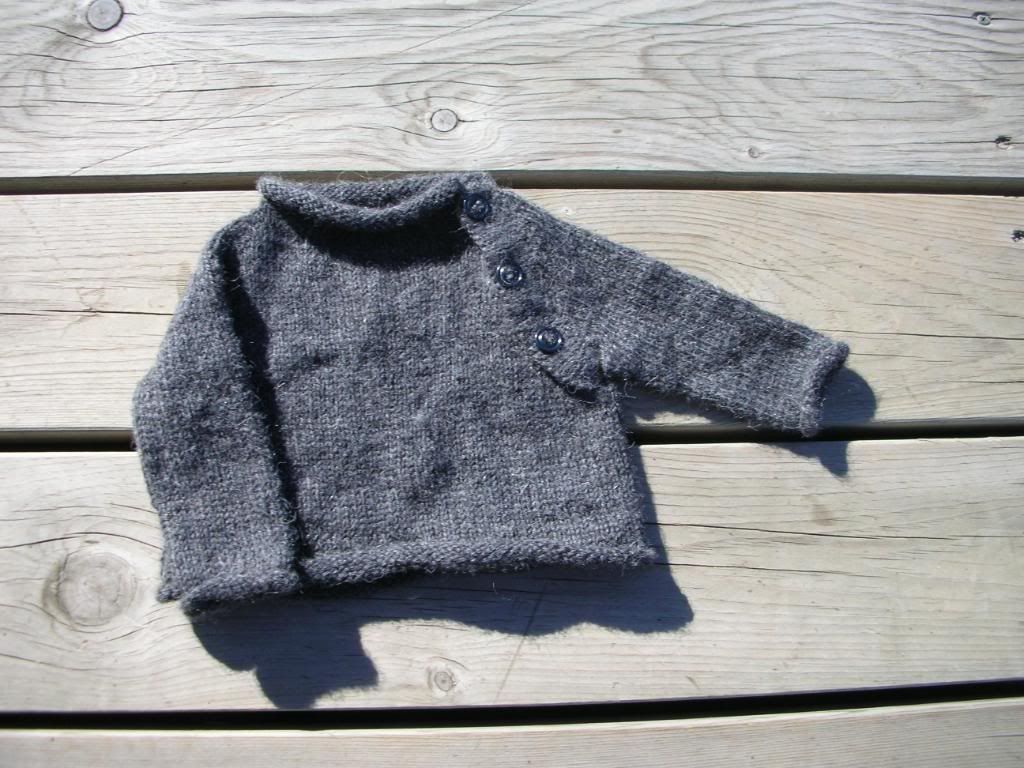
This is one of those simple yet beautiful sweaters. It is one of my favorites.
I'm well on my way to finishing the rough draft for the cabled bag as well. So far I have the newborn sizing complete and as soon as I can get my butt off the computer, I'm off to do some more swatching. I wasn't satisfied with the sizing of the original bag, arms were too narrow and the cables pulled more than I thought they would. I also didn't care for the button plackart placement on the cabled bag. It's cute on the plain sweater, but overload on the cabled. So, the new one will button down the front (or back if so desired), similar to this but with a smaller collar and a little longer to more easily slip the babe in.
That's all for now. I'm so happy to be almost done with this bag.
Now that I have the software, I am cruising on finishing the Baby Bag. So far the rough draft of the plain version is complete. Features for this include a super cute button along the raglan sleeve, car seat buckle hole option, 3 different sizes, newborn to 2T, knit in the round (gotta love seamless), button bottom or box bottom options. I've also included instructions for just a plain sweater without the bag bottom. This is the sweater version, for the bag just picture it longer.
This is one of those simple yet beautiful sweaters. It is one of my favorites.
I'm well on my way to finishing the rough draft for the cabled bag as well. So far I have the newborn sizing complete and as soon as I can get my butt off the computer, I'm off to do some more swatching. I wasn't satisfied with the sizing of the original bag, arms were too narrow and the cables pulled more than I thought they would. I also didn't care for the button plackart placement on the cabled bag. It's cute on the plain sweater, but overload on the cabled. So, the new one will button down the front (or back if so desired), similar to this but with a smaller collar and a little longer to more easily slip the babe in.
That's all for now. I'm so happy to be almost done with this bag.
Sunday, January 6, 2008
The Baby Bag
Wow! Just in the last couple days I've gotten numerous requests to get my butt movin' on finishing the baby bag. Ok, maybe not those exact words, but I get the picture. Charting the cables is what has been holding me up. I've tried using Excel for the charts and am just not satisfied, which means I'm gonna have to fork out some dough for charting software. Any suggestions? I know there are a few out there, some more costly than others. My tendancy is to get the cheapest, but maybe I'm missing out on something great because of my stinginess. I'll make a decision this week and then maybe I'll be able to get the pattern out before the 2 months that I've been saying.
Other news...
No more cottage license! I've been agonizing over this since I first began to offer it. I would like credit for my hardwork, but I also want to see people making my designs. I figure, it is a win win situation if I don't make my customers purchase a cottage license in order to sell my designs. Wahm's are not going to be rollin' in the dough by selling my britches (though I do wish that upon you all!) and you don't need an extra expense. The big advantage for me is getting my name as a designer out there. All I ask of my seller's is that you inform me of your intentions, give me an idea of your knitting experience, and most important, give me credit. If I like your work, I'd love to add you to my Adorabubble Knits Sellers page to direct customers to you. I want to be able to devote more time to finishing up my long list of designs (like the baby bag) and don't have time for customs anymore.
Saturday, January 5, 2008
2 legs at once, finally!
I finally got the video done on working 2 legs at the same time. What a bugger it was to make this!
Anyway, enjoy!
Anyway, enjoy!
Friday, January 4, 2008
Ugh!
I don't think I'll ever get these tutorials done that I've been promising everyone. I finally had both big boys in school and munchkin down for a nap, the perfect time to get the videos done. Of course, now I can't locate an essential part on the tripod. I'm annoyed and crabby and now you can add sick to the list. Argh! I sincerely apologize to those of you who are waiting. In the mean time, here is a pretty good tutorial http://www.socknitters.com/2circs/lessontwo.htm. I prefer to do magic loop with this method instead of 2 circular needles (easier to keep track of where you are at in the round), but the concept is the same.
Tuesday, January 1, 2008
Not How-To Tuesday
I don't know what I was thinking starting this right on New Year's Day. A combination of sleep deprivation, hyper/crazy children and major PMS equals no How-To-Tuesday. I reeeeally do want to get the 2 legs/socks at one time video up this week, it's just not going to happen today.
I'm going to bed...
I'm going to bed...
Subscribe to:
Posts (Atom)